Friday, March 27, 2015

PaperArtsy Grunge Paste "Springtime Nesting"

These birdies are ready for spring and found a nice home to nest in.  I was able to try a couple new things with this challenge:  mixing beads in my texture paste and working with clay!


I started with a wooden birdhouse and used textured paste thru a new stencil.  Then I mixed some aqua paint with my textured paste and added some mini beads for added texture.  I spread this in spots on all four sides. 


Next I mixed a light brown with some texture pasts and spread in spots on the sides.  Into the brown paste I stuck a few bronze beads so they could give the house a little shine.

 
The roof got a bit of the brown texture paste with beads added. I mixed orange and white to soften some of the roof and highlighted with orange.  Orange highlights were used around parts of the house as well as some aqua paint.


I used white clay to make the birds.  After they baked, I painted each with the aqua and gave them some orange highlights.  A thin glaze added a nice finish.  Beads were used for their eyes.

 
To attach the bird to the roof, I put a hole in the bird and also on the roof top then stuck a piece of wire in and glued him down.  Mama bird was glued to the base.


MixedMediaMonthlyChallenge Birds of a Feather(2) "Springtime Nesting"

These birdies are ready for spring and found a nice home to nest in.  I was able to try a couple new things with this challenge:  mixing beads in my texture paste and working with clay!


I started with a wooden birdhouse and used textured paste thru a new stencil.  Then I mixed some aqua paint with my textured paste and added some mini beads for added texture.  I spread this in spots on all four sides. 


Next I mixed a light brown with some texture pasts and spread in spots on the sides.  Into the brown paste I stuck a few bronze beads so they could give the house a little shine.

 
The roof got a bit of the brown texture paste with beads added. I mixed orange and white to soften some of the roof and highlighted with orange.  Orange highlights were used around parts of the house as well as some aqua paint.


I used white clay to make the birds.  After they baked, I painted each with the aqua and gave them some orange highlights.  A thin glaze added a nice finish.  Beads were used for their eyes.

 
To attach the bird to the roof, I put a hole in the bird and also on the roof top then stuck a piece of wire in and glued him down.  Mama bird was glued to the base.


Thursday, March 19, 2015

MIxedMediaMonthlyChallenge "Birds of a Feather"

My "birds of a feather"  was inspired by my new Gelatos set of yummy bright colors.  I used the wonderful selection of pink, red, and soft orange  to make my birds look like they were of the same species, tho I've never seen a pink bird!

I wanted to use a stretched canvas to display my "Springy Birds" and just happened to have one on hand.  I also was excited to pull out my Gelatos I received as a gift, and have some fun.

First I worked on the flower and some grass using texture paste.  After the paste dried, I played with my Gelatos using the green for grass and a mix of 4 colors for the flower.  I love the way just a bit of water spread the color around so nicely.  Then set aside to dry.

Next was drawing the bird shapes on the canvas along with their legs.  I let this dry a bit.  Then had fun with each of the 4 flower colors on 4 different birds and then mixed the colors on the tiny top bird.  Again I used some water to spread the colors out and past some of the outlined birds.

I Cut wings for each bird from some canvas fabric that came with my Gelato set perfect for a wing.  I stitched around each wing to keep the fraying contained and then used the same color Gelato on the wing and again used some water to spread.  I attached the wings with 3 French knots to the bird.

I used a large bead for each bird eye and stitch onto the canvas.  Then I matched some of the colors used in the flower with beads and glued them around the flower.

The stem is a piece of cord that I glued down, then sketched some leaves that I colored with the green Gelato.

Love my Gelatos and if I don't win some with this challenge....I'll definitely buy more yummy colors!


PaperArtsy Deconstruction2 Challenge: "Spring Vases"

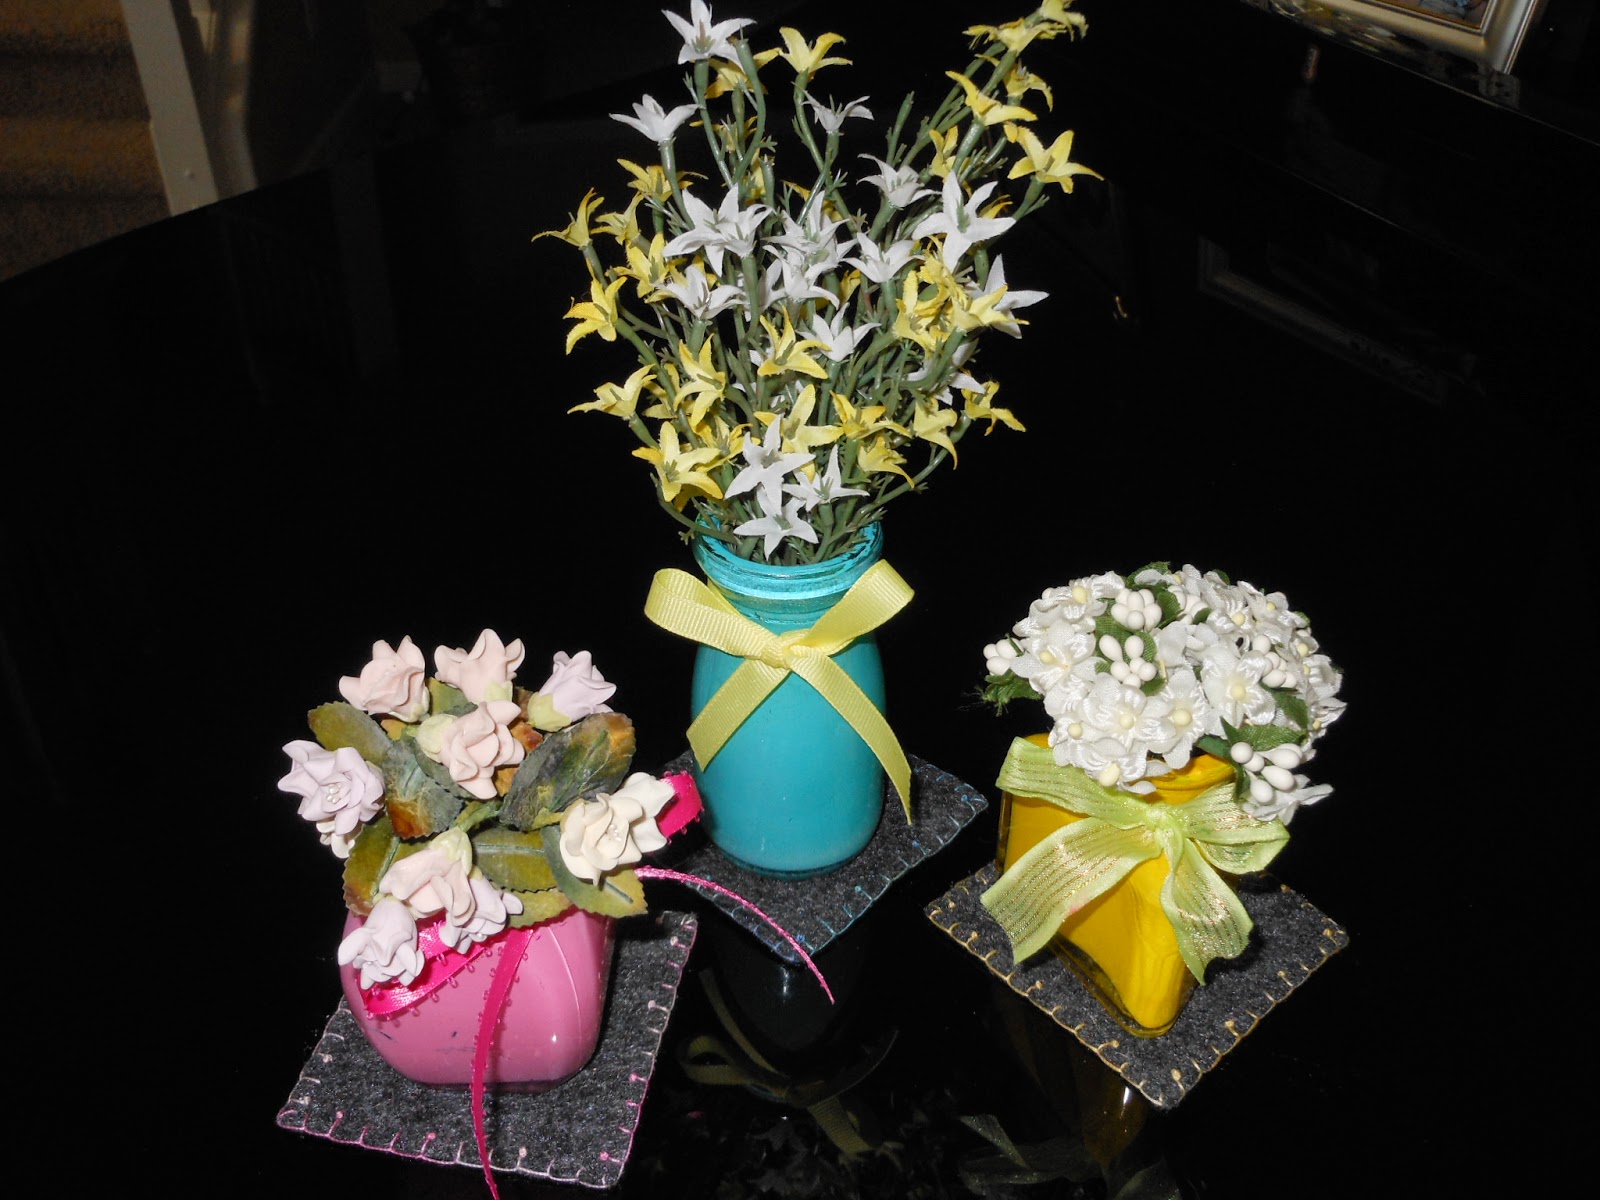
My second entry into PaperArtsy's Deconstruction Challenge is "Spring Vases".  Using mini jars, I altered them with painting the insides.

My first attempt at painting the insides of my mini jars was a bit disappointing.  The paint didn't move as I expected it would, so I added a little water to thin it.  Still didn't move or cover the glass very well.  I tried some other acrylic paint and it moved much better!

I "picked" some silk flowers and a ribbon for the vase neck and also made a little pad for each vase to sit on using felt and embroidering around the edges. 

My vases are sitting out next to some family pics.

Wednesday, March 18, 2015

Mixed Media Card Challenge: Hints of Spring

For my first entry to the Mixed Media Card Challenge, I made "Feeling Springy", with fabric birds and a flower stitched onto a card.

My bird design was sketched out on paper then transferred to freezer paper then ironed onto some "Springy" fabric for the birds. I cut out a flower from some fabric; all the birds and  flower  were cut from the same charm pack so they would coordinate.

Using a dab of my glue stick on the back of each piece, I then positioned them on the card.  Next I machine stitched each to the card using the frayed edge technique.

Beads were added as an eye for each bird and 3 beads in the center of the flower, which were attached by hand.  The flower's stem, leaves, bird's legs and eyes were done with markers. 


Monday, March 16, 2015

Deconstruction PaperArtsy #5

Love this challenge from PaperArtsy!  How fun to take something apart and use the pieces for a new piece of art!!  I decided to use some catalogs I was ready to toss and create an inspiration collage.

Spent an evening ripping up my catalogs with the thought of picking out creative-inspiring words and also long strips to make a woven base.

 
Black and white strips were laid out vertically and then strips with color were woven thru horizontally.  A spot of glue went under each top piece after weaving to hold the stips secure. While the glue dried, I picked out the words to display.  Using small cutup pieces of cardboard I attached a background cutout from my quilting catalogs and then glued the words on top of these.

 
After the glue dried on the background, I stamped on some color and did some embossing.

 
The woven background was attached to a heavy duty piece of cardboard.  Then the words were attached using brads.  A raffia ribbon was added to the top for hanging my piece.

 
It now has a place on a bulletin board where I do my crafting.
Thanks to PaperArtsy for your inspiration on this challenge!


Tuesday, March 3, 2015

Inchie flower book PaperArtsy Challenge

So much fun working in miniature.  Thanks to PaperArtsy for the challenge!

Decided to do my first inchie on paper, though I have plans for some fabric inchies.  Using white corrugated paper for my front and back covers and embossed white paper, I set about cutting my inchie "squares"...I left them a bit wider for the rings.

Keeping spring in mind, I used pastels thru most of the book.  So, painting the pages was next and then after they dried, some embossing for a little shine.

Next was working on the flowers.  I used mini buttons on the cover, made two tatted flowers, some metal flower beads, cut out of patterned paper two lovely glittered flowers, a page of 4 mini-mini patterned flowers, a couple of purchased paper flowers, a sweet pink flower button......and some sequins topped with French Knots. 

I wrote flowers, bloom, Beauty, and petal on pink handmade paper and attached to some pages. 


 I glued the pages back to back.  Then used a paper piercing tool to make two holes on each set of pages for my rings.


 Then I curved  wire to make two rings and slid the pages together on the rings.

Love my first inchie book!


Sunday, March 1, 2015

It's March! paperartsy challenge

It's March!

March 1st brought in a lovely 8" snowfall  with more to come.  I love being snowed in!,  but I'm about ready for Spring....


My Miniature for the PaperArtsy challenge was inspired by Veronica Funk who showed using a children's board book for her miniature.  I happened to have 2 on hand - closed my eyes and picked one - and was off sanding the pages then a good 2 coats of gesso.  Green was my choice for background color all the way thru. 


I used stamps, heart sponge, dauber, pens for ink and pen ends for patterns. 

 
 Washi tape was used on a few pages as were bits of thread and ribbon for the tops and sides of the pages.
Attached to a punched paper flower were bead flowers, then the punched flowers were attached with a brad.  I also spent some time making tatted flowers....still new to me is tatting!  I dedicated the tatted flower page to my daughter Katie who's birthday is March 15!

 St Patrick's Day is important to me as I am sure there are many bits of Irish blood in me.  Some shamrock ribbon, a textured paste shamrock made on a punched flower, lovely green sequins and a beaded shamrock on another punched flower decorated these two pages.

 
 Spring was a theme I used freely throughout my book including two pages to the first day of Spring which was my Dad's birthday.  And......

 
........ butterflies flitting over a couple of pages

 Of course there were several tributes to flowers with lots of beads, some buttons and some flower sayings:  "Flowers whisper "Beauty" "Earth laughs in flowers"

 
 I used some fabric on these two pages, yo yo flowers with ribbon stems and a bead for the center. Also, cut out flowers from fabric and stitched lots of beads to the centers


 On the cover and back and many other pages I used textured paste with a flower stencil and also a fern stencil.  There are also some mini silk flowers on front and back that were white and I painted with pastel paint.